AWS Marketplace
| Site: | 4Insights |
| Curso: | 4Insights |
| Livro: | AWS Marketplace |
| Impresso por: | Usuário visitante |
| Data: | Monday, 15 Sep 2025, 11:10 |
1. First steps
1. Launch the product via 1-click.
2. Access the application via web browser at http://<EC2_Instance_Public_DNS>:8080.
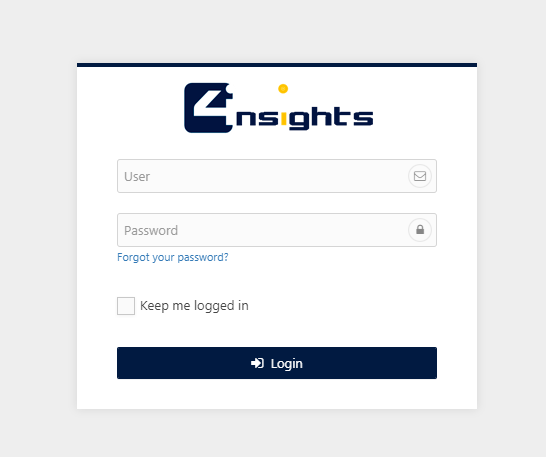
4. To enter the application you must fill in the "User" field with the "admin" value and the "Password" field with the Instance Id.
5. Follow the "Obtaining the License Trial (30 days) / Contractual" to request your license.
2. Accessing the Instance
With the instance started you can access the instance via SSH protocol using port 22, for this we should recommend you the Putty tool, the download is available at this address: https://www.chiark.greenend.org.uk/~sgtatham/putty/latest.html
1. After the Putty installation, in the “Session” settings enter the "Host Name (or IP address)" field by using the instance IP or "Public DNS"
Ex. ec2-user@<IP>
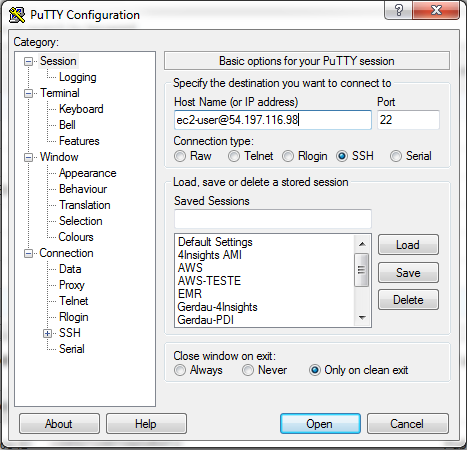
2. In the Connection > SSH > Auth category, select the private key that was made available when creating the instance (.ppk).

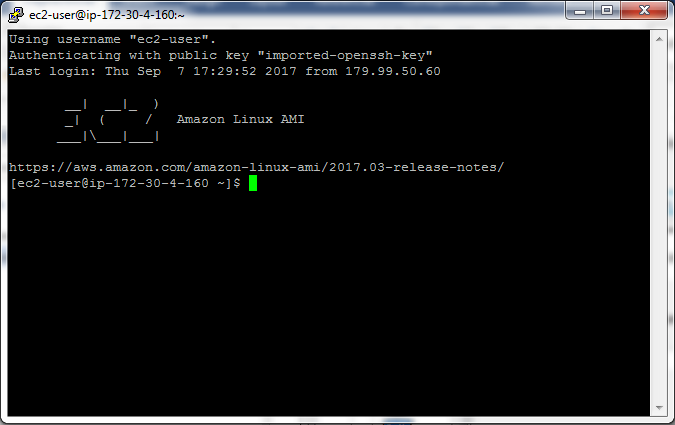
3. Click Open, and your session will start, as shown below.
2.1. Accessing the Database
4Insights uses MySQL 5.5.57 as a repository for storing the information saved in the tool, such as users, profiles, access credentials, parameters, templates, and environments.
With the Putty session open you can access MySQL by using the following command:
$ mysql -uroot -p
Note: By default the database instance is created with user "root" and password "root".

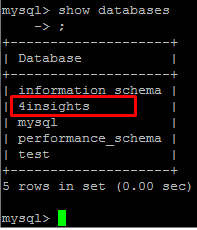
The database name used by 4insights is "4insights" and it can be viewed by using the following command:
mysql> show databases;
2.2. Apache Tomcat 8
To host the 4insights web services Apache Tomcat is used in version 8, all the settings are Tomcat installation defaults, you can access the Tomcat application manager by using this address in your browser:
http://<public-dns>:8080/manager
You will be required to inform a user and password, the user name (nome do usuário) is "admin" and the password (senha) is "admin".
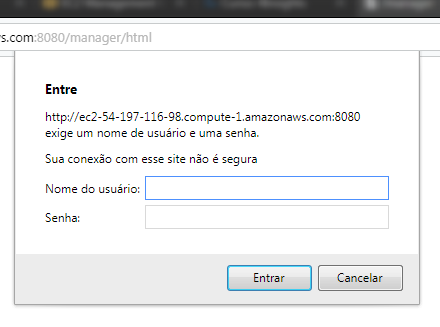
After entering the user and password click on Login (Entrar), the tomcat management page will be displayed.
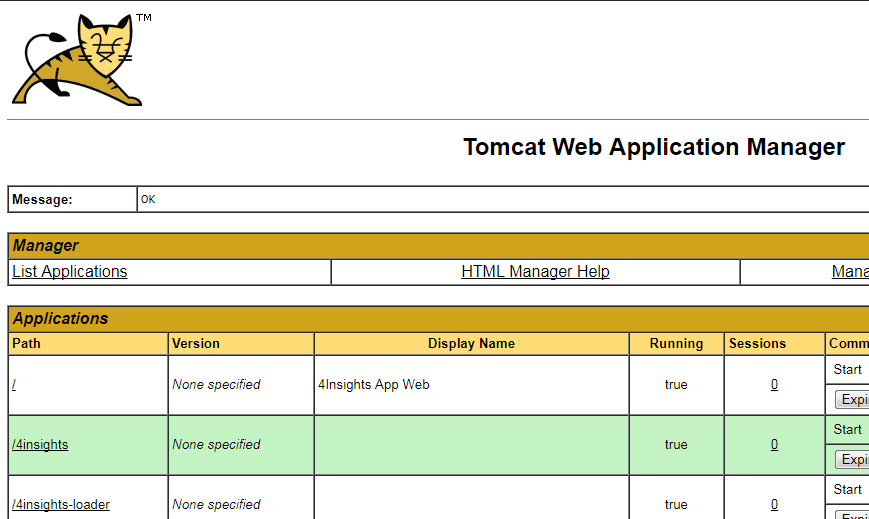
Note: 4insights services will be the top 3 in the application listing.
Changing the Default Tomcat User
1. You can change the tomcat user and password by changing the tomcat-users.xml file, which is inside the /usr/share/tomcat8/conf directory, to change the file use the following command:
$ sudo vi /usr/share/tomcat8/conf/tomcat-users.xml
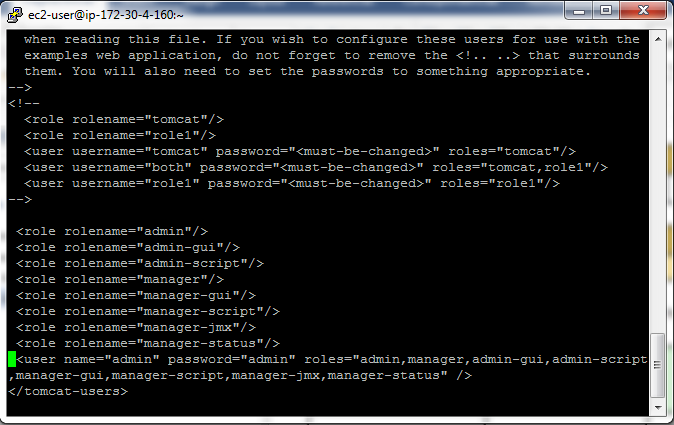
2. Identify the <user> element and change the "name" and "password" properties.

3. Save and exit the file using the command:
$ :wq!
4. For the changes to take effect it is required to restart the tomcat service, to restart the service please use the following command:
$ sudo service tomcat8 restart
5. Wait for the service to start and the user will be changed.
Changing the Default Tomcat Port
1. By default the port used by Tomcat is 8080, to change this port you must change the server.xml file, which is inside the /usr/share/tomcat8/conf directory, to change the file, please use the following command:
$ sudo vi /usr/share/tomcat8/conf/server.xml
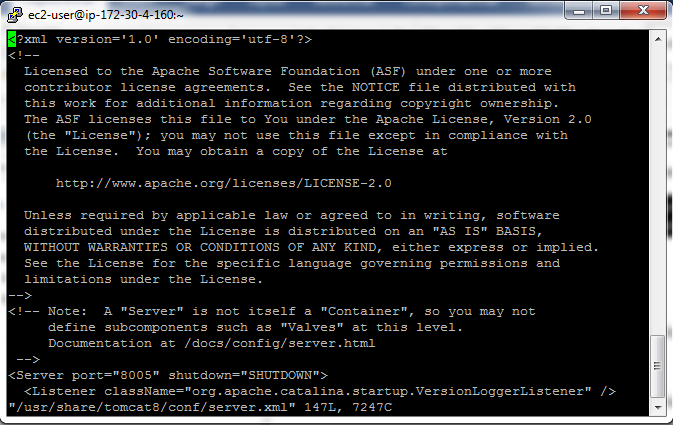
2. Identify the <Connector> element and change the "port" property and add the new port.

3. Save and exit the file using the following command:
$ :wq!
4. For the changes to take effect it is required to restart the tomcat service, to restart the service please use the following command:
$ sudo service tomcat8 restart
5. Wait until the service starts and the port will be changed.
Note: You can also add a new port, by adding another <Connector> element instead of changing the existing one, so the server will respond to all configured ports.
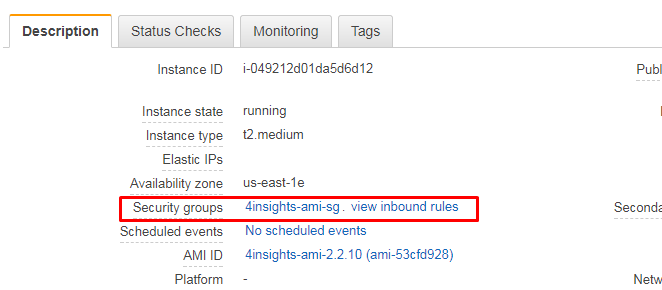
6. In the creation of the instance a Security Group has been associated with the purpose of controlling which ones are the inbound and the outbound ports, in order for its new port to be available it is required to add the new port in this group on its AWS console, get in the EC2 service and identify the instance.

7. When selecting the instance, your information will be displayed in an area below, in the "Description" tab, identify the "Security Groups" field.
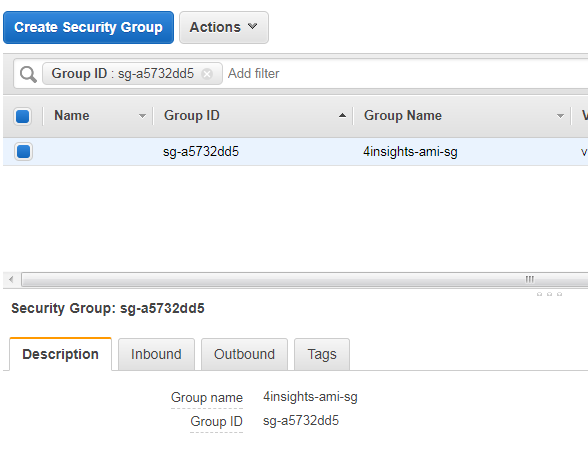
8. Click the Security Group link and you will be redirected to the information for this group.
9. With Security Group selected click the "Inbound" tab and then the "Edit" button.
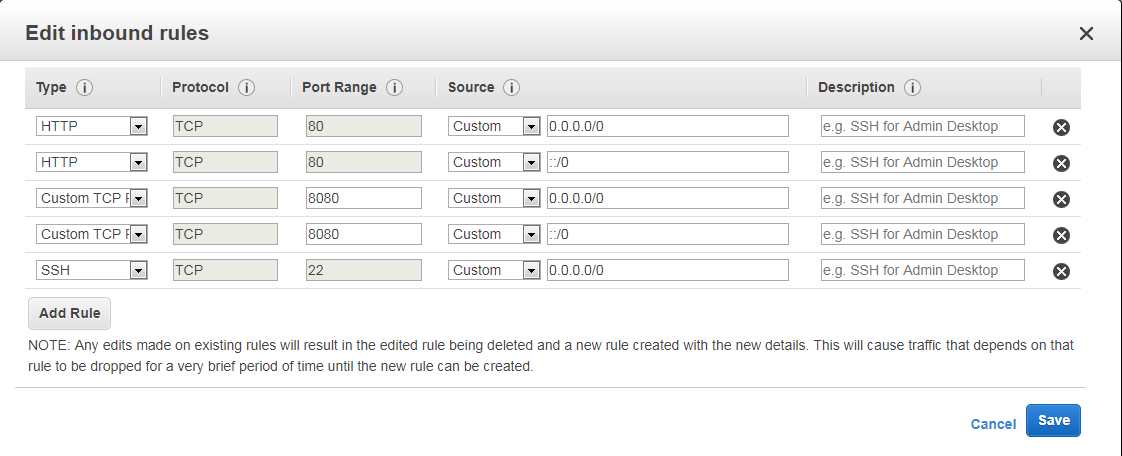
10. If you have added a new port in the server.xml file, click "Add Rule" and type in the "Port Range" field with the number in the new port and in the "Source" field, select "Anywhere".

11. Click Save and try to access tomcat by using the new port.

3. Web Components Update
1. Stop the tomcat service
$ sudo service tomcat8 stop
2. Go to the folder containing the 4insights packages within tomcat.
$ cd /usr/share/tomcat8/webapps
3. Remove all existing 4insights packages in there.
$ sudo rm -rf 4insights 4insights.war 4insights-loader 4insights-loader.war ROOT ROOT.war
4. Download the 4Insights packages again (Latest version)
$ sudo wget http://4insights-packages.s3.amazonaws.com/public/latest/4insights-loader.war
$ sudo wget http://4insights-packages.s3.amazonaws.com/public/latest/4insights.war
$ sudo wget http://4insights-packages.s3.amazonaws.com/public/latest/console.war
5. Rename "console.war" package as "ROOT.war" to be opened from the tomcat root
$ sudo mv console.war ROOT.war
6. Start tomcat again.
$ sudo service tomcat8 start
Note: To follow the service initialization you can run the following command:
$ sudo tail -f /usr/share/tomcat8/logs/catalina.out